Color adjustment
LEDVIZ can adjust the color of the entire output and of individual images and videos. A file-specific adjustment always takes precedence over the global output correction.
Adjust the entire output
Section titled “Adjust the entire output”- Open EXTRA → Farben kalibrieren → Ausgabe anpassen (color calibration → adjust output).
- Enable color adjustment using the checkbox.
- Set the RGB values with the sliders.
- Enable Live-Vorschau (live preview) when you want to see the changes directly in the output.
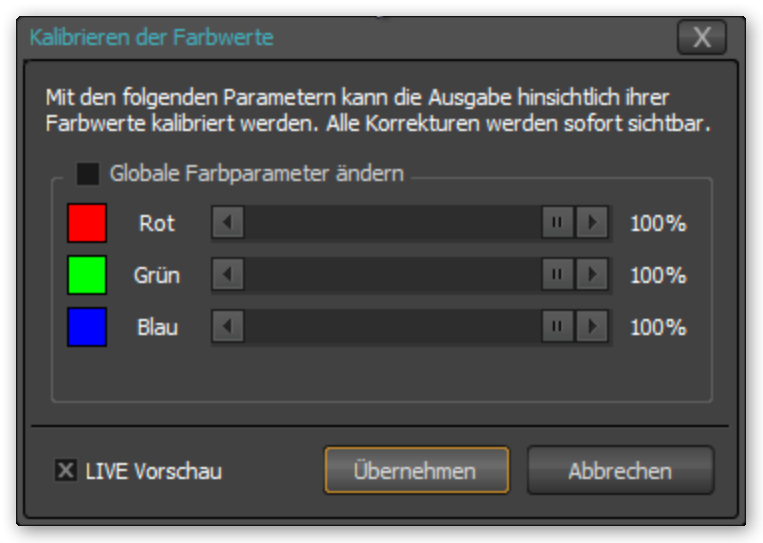
These settings apply equally to all files unless an individual file adjustment has been defined. The global correction is stored in the LEDVIZ software and is not part of the project file.
Adjust images and videos
Section titled “Adjust images and videos”DirectX treats both images and videos as textures, so color adjustment works in the same way for both media types.
- Open EXTRA → Farben kalibrieren → Video / Bild anpassen (color calibration → adjust video/image).
- Select an existing adjustment from the dropdown, or click the green plus to its right to create one.
- Select a file from the current project.
- Adjust the sliders. The color bar beneath the filename provides a schematic preview of the effect.
- If the output is open, enable LIVE-Vorschau (live preview) to see the effect directly.
- Save the project file afterwards.
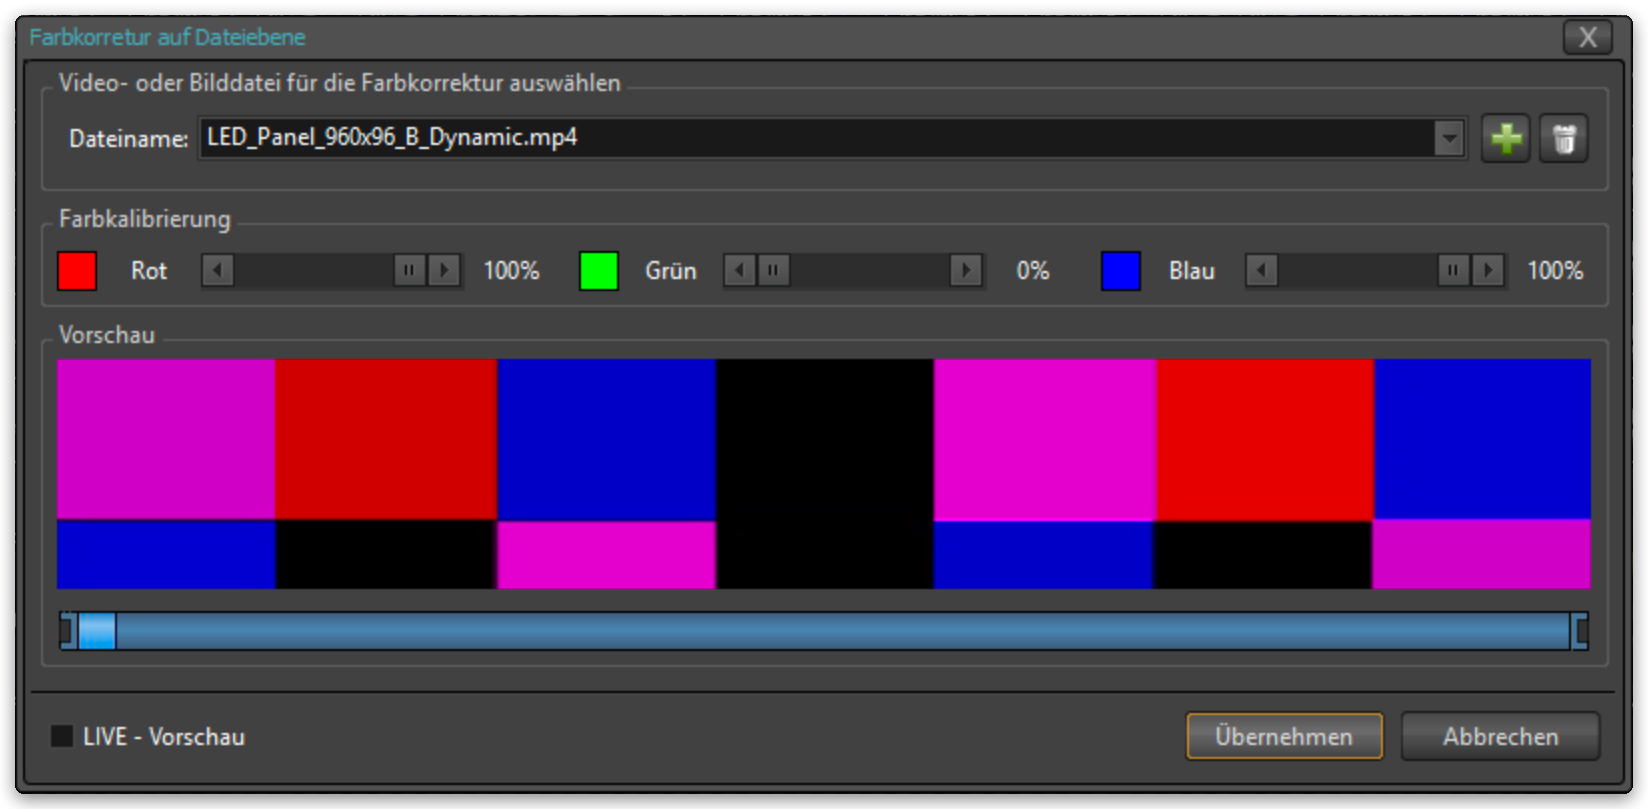
Adjustments are associated with the filename. File-specific color adjustments are stored in the XML project. The existing documentation states that there is no system-imposed limit on the number of files with individual adjustments.
Working with RGB values
Section titled “Working with RGB values”Each channel can be set from 0% to 100%. Red, green and blue all start at 100%.
- Reduce brightness: Set all three sliders to the same value, such as 80% / 80% / 80%.
- Increase the relative amount of red: Keep red at 100% and reduce green and blue.
The percentages determine the contribution of each color channel.
This reference is based on the existing LEDVIZ documentation. Some screenshots show an earlier application interface. Original documentation